73 - 1st Battle of Bullecourt - The Australian Infantry's most brilliant achievement

73 - 1st Battle of Bullecourt - The Australian Infantry's most brilliant achievement

Author: James Eling September 30, 2021 Duration: 26:35

This Episode looks at the lessons for the employment of Artillery at the 1st Battle of Bullecourt.  CEW Bean, the author of the official History wrote that Australian troops braved the odds in numerous battles, but that Bullecourt was the most

brilliant of these achievements, impressing both enemy and friends alike.

This Bullecourt miniseries is part of our 150th Anniversary of the Royal Australian Artillery series.

We look at the strategic picture in 1917, with Germany realising that time is on the side of the Allies. The commencement of unrestricted warfare is an attempt to deny Great Britain the resources required to remain in the war, setting the conditions for the war to be won, before the United States mobilisation makes victory impossible.

The last of the ANZAC Divisions arrived on the Western Front in November 1916 - this was Monash's 3rd Australian Infantry Division.  On the 23rd of February, German troops started thinning out the line and Operation Alberich, the withdrawal to the Siegfried Line.

Operation Alberich
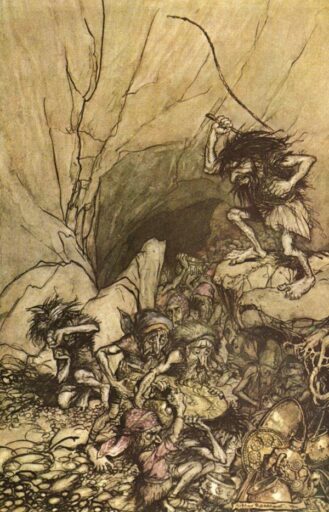
The Germans termed the withdrawal Operation Alberich, after Alberich the dwarf who fashions a ring out of Rhine Gold. The ring he forges grants the power to rule the world. The Siegfried Line was named after a legendary hero of Germanic legend who slew a dragon and was later was later murdered. He may have been based on Arminius of the Tuetoburg Forest. These legends were featured in Wagner's Ring Cycle, an epic Opera over 4 nights with the last night entitled Gotterdammerung, The Twilight of the Gods.

Trench foot Australian Army Western Front 1916 DecemberThe winter of 1916-17 was the worst in the last 40 years and the conditions took a terrible toll on the soldiers in the front lines. Here Australian Army Medical Corps members evacuate cold casualties.

In December 1916, Joffre was replaced with General Robert Nivelle. Originally Lloyd George wanted to place Haig under Nivelle, which would have simplified command arrangements, but Haig would not countenance the idea. Haig was keen to create his own breakthrough if possible, but this would be difficult with the main effort, the Nivelle Offensive, receiving the majority of the guns and ammunition.

The nivelle OffensiveSupporting the French Nivelle Offensive was the reason for the Arras Offensive. The British would draw German troops into the Arras area, and potentially trigger the German committal of their Reserve, setting the conditions for the French breakthrough further North.

Gough - The ThrusterGough, was termed the Thruster. Commander of Fifth Army. A cavalry Officer, he exhibited the best and worst tendencies of cavalry officers.

Bullcourt, in the Queant area was to support Allenby's Third Army's attack at Arras. Allenby's attack was also supported at Vimy by the Canadian Corps under LT GEN Byng. This will be the subject of another podcast partially to celebrate 150 years of Canadian Artillery - UBIQUE!, and partially to compare and contrast with Bullecourt. The Battle at Bullecourt literally became the textbook example of how not to conduct a battle - it was taught in British Staff Colleges of the dangers of poor planning. Vimy Ridge is almost the perfect juxtaposition - Byng vs Gough, detailed planning vs big hands small map, artillery vs no artillery, CBSO vs little effective counter battery effects, ammunition allocation (50,000 tons were fired in pre H-Hour fires), vs an inadequate allocation, enough guns vs clearly insufficient numbers of batteries, and coordination and cooperation across corps vs little coordination. The Vimy Ridge battle was an exemplar of how to attack a strongly defended objective in the First World War and many of the techniques developed at Vimy would be used by Monash in 1918 in his first Battle as Corps Commander in the Battle of Hamel.

The Arras Offensive MapThe Bullecourt Battle was a support effort to Allenby's Third Army Arras Offensive.

Join the conversation on Twitter or Facebook.


Hosted by James Eling, The Principles of War-Lessons from Military History on Strategy, Tactics, Doctrine and Leadership is a deep dive into the timeless patterns of conflict. This isn't just a recitation of dates and troop movements. Instead, each episode takes a pivotal historic battle and examines it through the lens of enduring military principles, extracting practical insights on strategy, combined arms, and command. The discussions are structured to serve as a resource for professional military education, condensing complex analyses into focused, thirty-minute sessions. You'll hear how decisions made centuries ago still resonate within modern doctrine, offering lessons on leadership and tactical execution that are applicable far beyond the battlefield. The aim is to provide these lessons in a compelling narrative format, moving beyond dry after-action reports. For anyone fascinated by how history informs present-day thinking in governance, organizational leadership, and strategic planning, this podcast functions as a regular, thought-provoking seminar. Tune in to explore the fundamental concepts that have shaped outcomes throughout military history and continue to define success in high-stakes environments.
Author: Language: English Episodes: 100

The Principles of War - Lessons from Military History on Strategy, Tactics, Doctrine and Leadership.
Podcast Episodes
69 - British CoG under Churchill - Battle of France 1940 Part V [not-audio_url] [/not-audio_url]

Duration: 29:17
This is the second part of our CoG analysis for the Battle of France series. We discuss the Centre of Gravity under the Churchill Government. What was Churchill trying to achieve and what was the one entity that was goin…
67 - Overview of the Battle of France 1940 II [not-audio_url] [/not-audio_url]

Duration: 40:34
Battle of France II - Campaign Overview. This episode is the second part of our overview of the Battle of France Campaign. Thank you to the British Army's Lessons Exploitation Centre for the assistance with getting the r…
66 - Overview of the Battle of France I [not-audio_url] [/not-audio_url]

Duration: 27:29
Battle of France II - Campaign Overview. This episode is the first part of our overview of the Battle of France Campaign. Thank you to the British Army's Lessons Exploitation Centre for the assistance with getting the re…
65 - Battle of France 1940 [not-audio_url] [/not-audio_url]

Duration: 38:16
The German Army's tanks were outnumbered 1.7:1 and most of the tanks were inferior, and yet the French were defeated extremely quickly. This podcast series will focus on the counter attack at Arras, but we will look at a…
63 - The Birth of Australian Artillery [not-audio_url] [/not-audio_url]

Duration: 35:29
This is the first of a special series of podcasts commemorating 150 years of permanent Artillery in Australia. This episodes looks at the early years. The birth of 'A' Battery The range of batteries, and their equipment…
62 - Sir Max Hastings and Lessons Learnt from Vietnam [not-audio_url] [/not-audio_url]

Duration: 20:54
This is Part II of our interview with Sir Max Hastings, the author of Vietnam, An Epic Tragedy. Check out the show notes for the podcast for all of the information that we cover in this episode as well as the images and…
61 - Vietnam - An Epic Tragedy and Moral Centers of Gravity [not-audio_url] [/not-audio_url]

Duration: 20:19
This is Part I of our interview with Sir Max Hastings, the author of Vietnam, An Epic Tragedy. Check out the show notes for the podcast for all of the information that we cover in this episode as well as the images and o…
60 - Nelson and the Amphibious Raid on Tenerife [not-audio_url] [/not-audio_url]

Duration: 29:51
This is Part V of our look at Lord Horatio Nelson and the practice of Mission Command. Check out episode 1 of our Nelson and Mission Command series. This covers the amphibious raid on Tenerife and what went wrong in Nels…